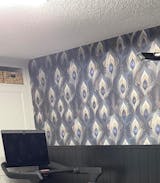
Please carefully read the instructions below before starting the installation process. It's advisable to test the installation with a wallpaper sample first before proceeding with a larger purchase.
Wall Preparation
The wall preparation is a crucial step in the installation process. The wall must be smooth, free of any textures, and have no contaminants. Fill any holes and sand down rough areas to ensure the wall is flat and smooth. Clean and dry the wall before beginning the installation.
Note: The Peel and Stick Wallpaper can be removed and reapplied multiple times, but its adhesive effectiveness may decrease if it accumulates too much dust, dirt, or fibers.
Recommended Tools:
- Spirit level
- Smoothing tool
- Pencil
- Sharp utility knife with extra blades
Hanging Preparation
The Peel and Stick Wallpaper panels come numbered in the order they should be hung. Lay the panels out side by side, ensuring that they are in order, without any defects or damages, and the print is aligned across all panels. It's recommended that two people perform the installation.
It is essential that the first panel is installed correctly. To ensure that the first panel is straight, draw vertical markings (64.5 cm from the left corner) using a spirit level, measuring tool, and a pencil. Use these markings as a guide when hanging the first panel. The markings should be as faint as possible to avoid showing through the wallpaper.
Installing the First Panel
The first panel installation is straightforward, like applying a sticker. Start from a corner and gently peel the backing paper from the wallpaper. Apply the top of the panel to the wall, starting from the top left corner, making sure the left edge aligns with the vertical line. Peel away more backing paper as you move downward and smooth and fix the paper to the wall. If necessary, lift and re-apply the panel to align it correctly and eliminate bubbles.
Additional Panels
Apply the second and subsequent panels, making sure the pattern matches up and the paper overlaps the top and bottom edges. The panels should be applied edge to edge, with each panel butting up against the next on the wall, without overlapping. Press the panels together firmly at the seams, avoiding hard creases. If there are any bubbles or wrinkles, lightly press or smooth them out or peel back and re-apply that area. Note: Pressing too hard won't damage the wallpaper.
Trimming the Bottom, Top, and Side
Once all the panels are hung, trim the top and bottom edges, plus the far right side, using a trim guide and a sharp utility knife. Ensure you have a sharp blade for the best results.
Useful Tips
If a bubble reappears in the next day or two, press lightly and smooth it out towards the edge. This may happen if oil, dirt, or dust is on the wall under the wallpaper. Alternatively, use a sewing pin to pop the bubble and then smooth it out in a circular motion with your fingers.
Removing the Wallpaper
To remove the wallpaper, grab a corner and gently peel away from the wall.


